Showing posts with label models. Show all posts

Saturday, January 30, 2016

Sci-fi settlements

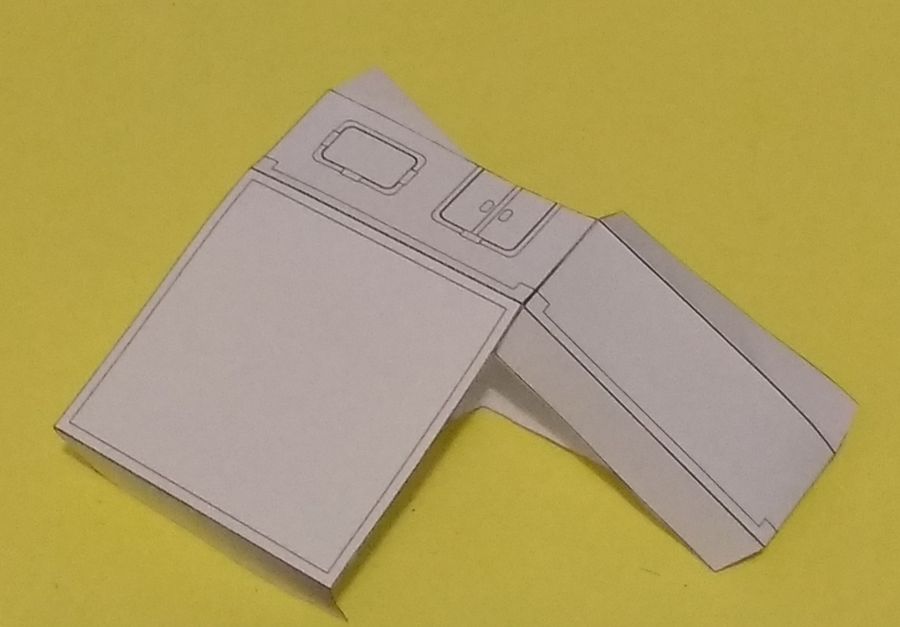
I created a few, simple sci-fi settlement buildings in 15mm scale to use in miniature games. Here is a link to the PDF file with uncolored and colored versions.
Low-resolution preview of the colored version
The buildings can be assembled as fold-flat or permanent structures. Not as simple as Toposolitario's Ikubes but still very handy. Each building is 75mm x 75mm x 30mm.


Here is a picture of a test build, along with some miniatures (15mm at eye level.)

"On the count of three..."

Tuesday, November 3, 2015

Painted paper starships

Previously I wrote about the paper starships I was building to play space games. Last weekend I finally painted and mounted them on stands.
The ships, made of thick cardstock, and stands made of toothpicks and foamcore.
I picked up two simple and contrasting color schemes, mostly for visibility on the table.
However, placing blue starships over a blue cutting mat was not the greatest idea.
And here are the results. The ships were glued to the stands with a mix of superglue and white glue.
The two small fleets ready to fight.
Now I am almost ready to play Full Thrust and other games. I just have to get a sheet or two of black cardstock to use as a playing area. I still need to flash, prime and then paint my metal starships too. However I am thinking of using blue-gray and green-gray color schemes on them.

Saturday, October 24, 2015

Laser (printed) Mechs

After a while, I came back to building 6mm Armor Grid miniatures. Following the suggestion from Wouter on the comments of my previous post on this subject, this time I colored them using color pencils. These are also scaled to 40% of the original size, but I printed both the uncolored and gray versions -- the gray ones give a nice, not too dark shading on a laser printer.
Left: uncolored (line art) painted green, right: gray (shaded) painted blue
The process of cutting, painting the edges black and building them was not hard, and the new models from the Mech Factory set are even easier to cut as the legs and torso come in separate parts.
Another view. These models stand about 3/4" tall
Up close, the shaded version looks better. From a distance, the line art-only version is brighter and thus, more readable. Even then, though, I would probably use the shaded version to build an army.

Hand-coloring paper miniatures takes away (at least part of) one of their advantages, but I was curious about how good or bad they would look. I am satisfied with these results, so I will probably keep trying this with other models and miniatures -- especially in 2mm, 6mm and 15mm scales.

Saturday, June 6, 2015

Paper and metal... in spaaace

I was surprised today by the arrival of an international mail package. I would expect it to be the French napoleonic miniatures that I got from Aleksandar's giveaway, Instead, they were the Full Thrust starter packs from Ground Zero Games. From previous experience (admittedly, a small sample) packages from Europe take from 1 to 3 months to arrive -- this time, it took about 20 days.

I also found out that my scratch-built ships were smaller than the GZG ones, so my frigates, destroyers and light cruisers have been turned into corvettes, frigates and destroyers.

Now I have to try and paint all of these ships to get them to the table. I am also looking for tips on mounting metal ships to the flight stands. I think at least some of them will require a bit of putty, as the hole in some of the ships is larger than the peg on the stands.

Saturday, May 16, 2015

Paper starships

Although I have recently ordered two Full Thrust starter kits from Ground Zero Games, I wanted to try my hand at making some paper, or otherwise scratch-built starships. Here are the results. The bases are made of black foamcore, the flight posts are toothpicks painted black. The ships on the left are made of folded paper, printed and colored with pencils. The two on the right are made with thick cardstock and toothpicks, and painted with acrylic paints.


Here are close ups of each set of ships. First the paper ones. I made the greenish one a while ago and posted it at the Cardboard Warriors forum. I made the other ones to try this other style but the result is quite fiddly to fold properly and to glue to the base.


And here are the scratch-built ones. These were cut without any previous planning. Based on the results, I intend to make a few templates so that I can have two squadrons to play. Even after I get the metal ones, I will probably still use them together.


Lastly, here is a shot of some movement and turn templates I made for Full Thrust, inspired by the maneuver tools from the X-Wing miniatures game. This are just a half disk with 30 degree increments and a straight rectangle with 1 and 1/2 inch increments.


Sunday, May 10, 2015

A bunch of other paper minis in 6mm scale

Today I went back to the project of using reduced Armor Grid miniatures, printed at 40% of their original size, as 6mm forces in games such as Strike Legion and 5150 Battalion Commander (previously I built some at 50% scale but 40% makes infantry size correct.)

I used the uncolored versions as I now have access only to a monochrome laser printer. I am still unsure if I will print them in colored paper or try to color them by hand.


Instead of assembling the infantry stands in a cross formation (which is mounted on an hexagonal base in Armor Grid), I simply folded each troop piece and glued them to a 1.5" x 0.5" base. For a command stand, I would use the original formation.


The light mechs were surprisingly easy to build, as I would only cut an approximate contour, while at the original scale I would spend a long time making every little cut precisely.


So this is it, any comments are welcome. I have some plans to run a short sci-fi campaign with some of these miniatures...

Sunday, February 15, 2015

Tall Top-down Tokens

Today I have made another experiment with top-down tokens. It is nothing really new but I wanted to see what kind of result I could get with my monochrome laser printer.

The tokens are glued to a 2mm thick EVA ("foamies") sheet. I print out the tokens and also some templates to cut extra pieces and stack them to varying heights. This way, obstacles that grant cover are 1 layer tall, infantry uses 2 layers, vehicles use 3 layers and buildings are 4 layers tall (in the test building in the picture, there are additional bits glued on top of it.)

The result is not very fancy but the different heights are helpful in understanding what each piece is, and add some "three dimensional feel" to an otherwise flat board. I might make a portable set this way, only using black foam as green is a little distracting (especially on the buildings.)

Saturday, July 26, 2014

My current terrain inventory

After deciding to stick with 15mm scale terrain, I spent some time in the last few days organizing what I had and building some additional pieces.

Here is the terrain I currently have. Most of it fits in a storage box (38cm x 24cm x 18cm) and some older, simpler buildings and tiles are stored in a plastic folder.


So, what exactly is in the box? Plenty of stuff, useful for modern, post-apocalyptic and sci-fi gaming.

First, there are 10 flat-folding buildings based on WorldWorks Games swift scenics line, more specifically the office and abandoned buildings.

Friday, July 25, 2014

Desert Skiff built at 15mm scale

Here are some pictures of the desert skiff printed at 50% scale, to play with 15mm miniatures:


The miniatures are from Slick's Minis and Spacejacker. Expect a battle report soon using this model...


This reduced model was printed on regular 90g/cm2 paper. There were no major problems making the cuts and folds at 50% scale but I really recommend trimming the tabs marked with an "X" before folding and gluing the double-sided parts. This avoid double-thickness tabs that will be harder to fold properly.


Normally I would apply a black pen to the edges of the pieces but in this case, as I cut them I felt that leaving the white edges contributed to the rough/worn look that I wanted.

Thursday, July 24, 2014

Desert Skiff 3D Model

I have finished texturing the Desert Skiff 3D model in 28mm scale. It requires printing five pages although one is optional, with the "floating" base. Here is a low-resolution preview of the parts:


You can download PDF files from these links for Letter-sized or A4-sized pages.

Sunday, July 6, 2014

Work in Progress: Desert Skiff model

I am currently working on a "desert skiff" paper model in 28mm scale, for the Cardboard Warriors monthly figure hoard. It is inspired by similarly-named vehicles found in Star Wars and in the game Borderlands 2. Here are some pictures of a quick and dirty build of the template, just to check if everything is fitting together.


That flag pole did not look good in the model so it will not be an option in the final model. For a few more pictures, check this thread on the forum...

Edit: here is the template for the model, in Inkscape format.